Slip Cast Duck Mould
Using a plastic duck we created a mould to slip cast identical models of the duck.
Initially I cut the shape of the duck out from a slab of clay and placed the duck into the cutout. I then layered the clay up until half the duck was covered, ready for 0.5L of plaster mix to be poured onto it. After pouring the plaster I then smooth and "clean up" the plaster ready for soft soap. The soft soap will prevent the next pour of plaster binding with the initial layer. I wipe soft soap all around the plaster three times, each time cleaning the soft soap away with water. I then pour the next part of the plaster which creates the second part of the slip cast mould.


Slip Casting
I made three piece mould of a duck using plaster so I can make 5 slip cast ducks.
We pour the slip into our moulds to the top and wait. Initially everyone on the table worked together, each leaving the slip from separate times. The times were 30, 35, 40, 45 mins. Once the time is up we remove the skin that has formed and pour back into the slip jug and place on the drip tray until it is dry.

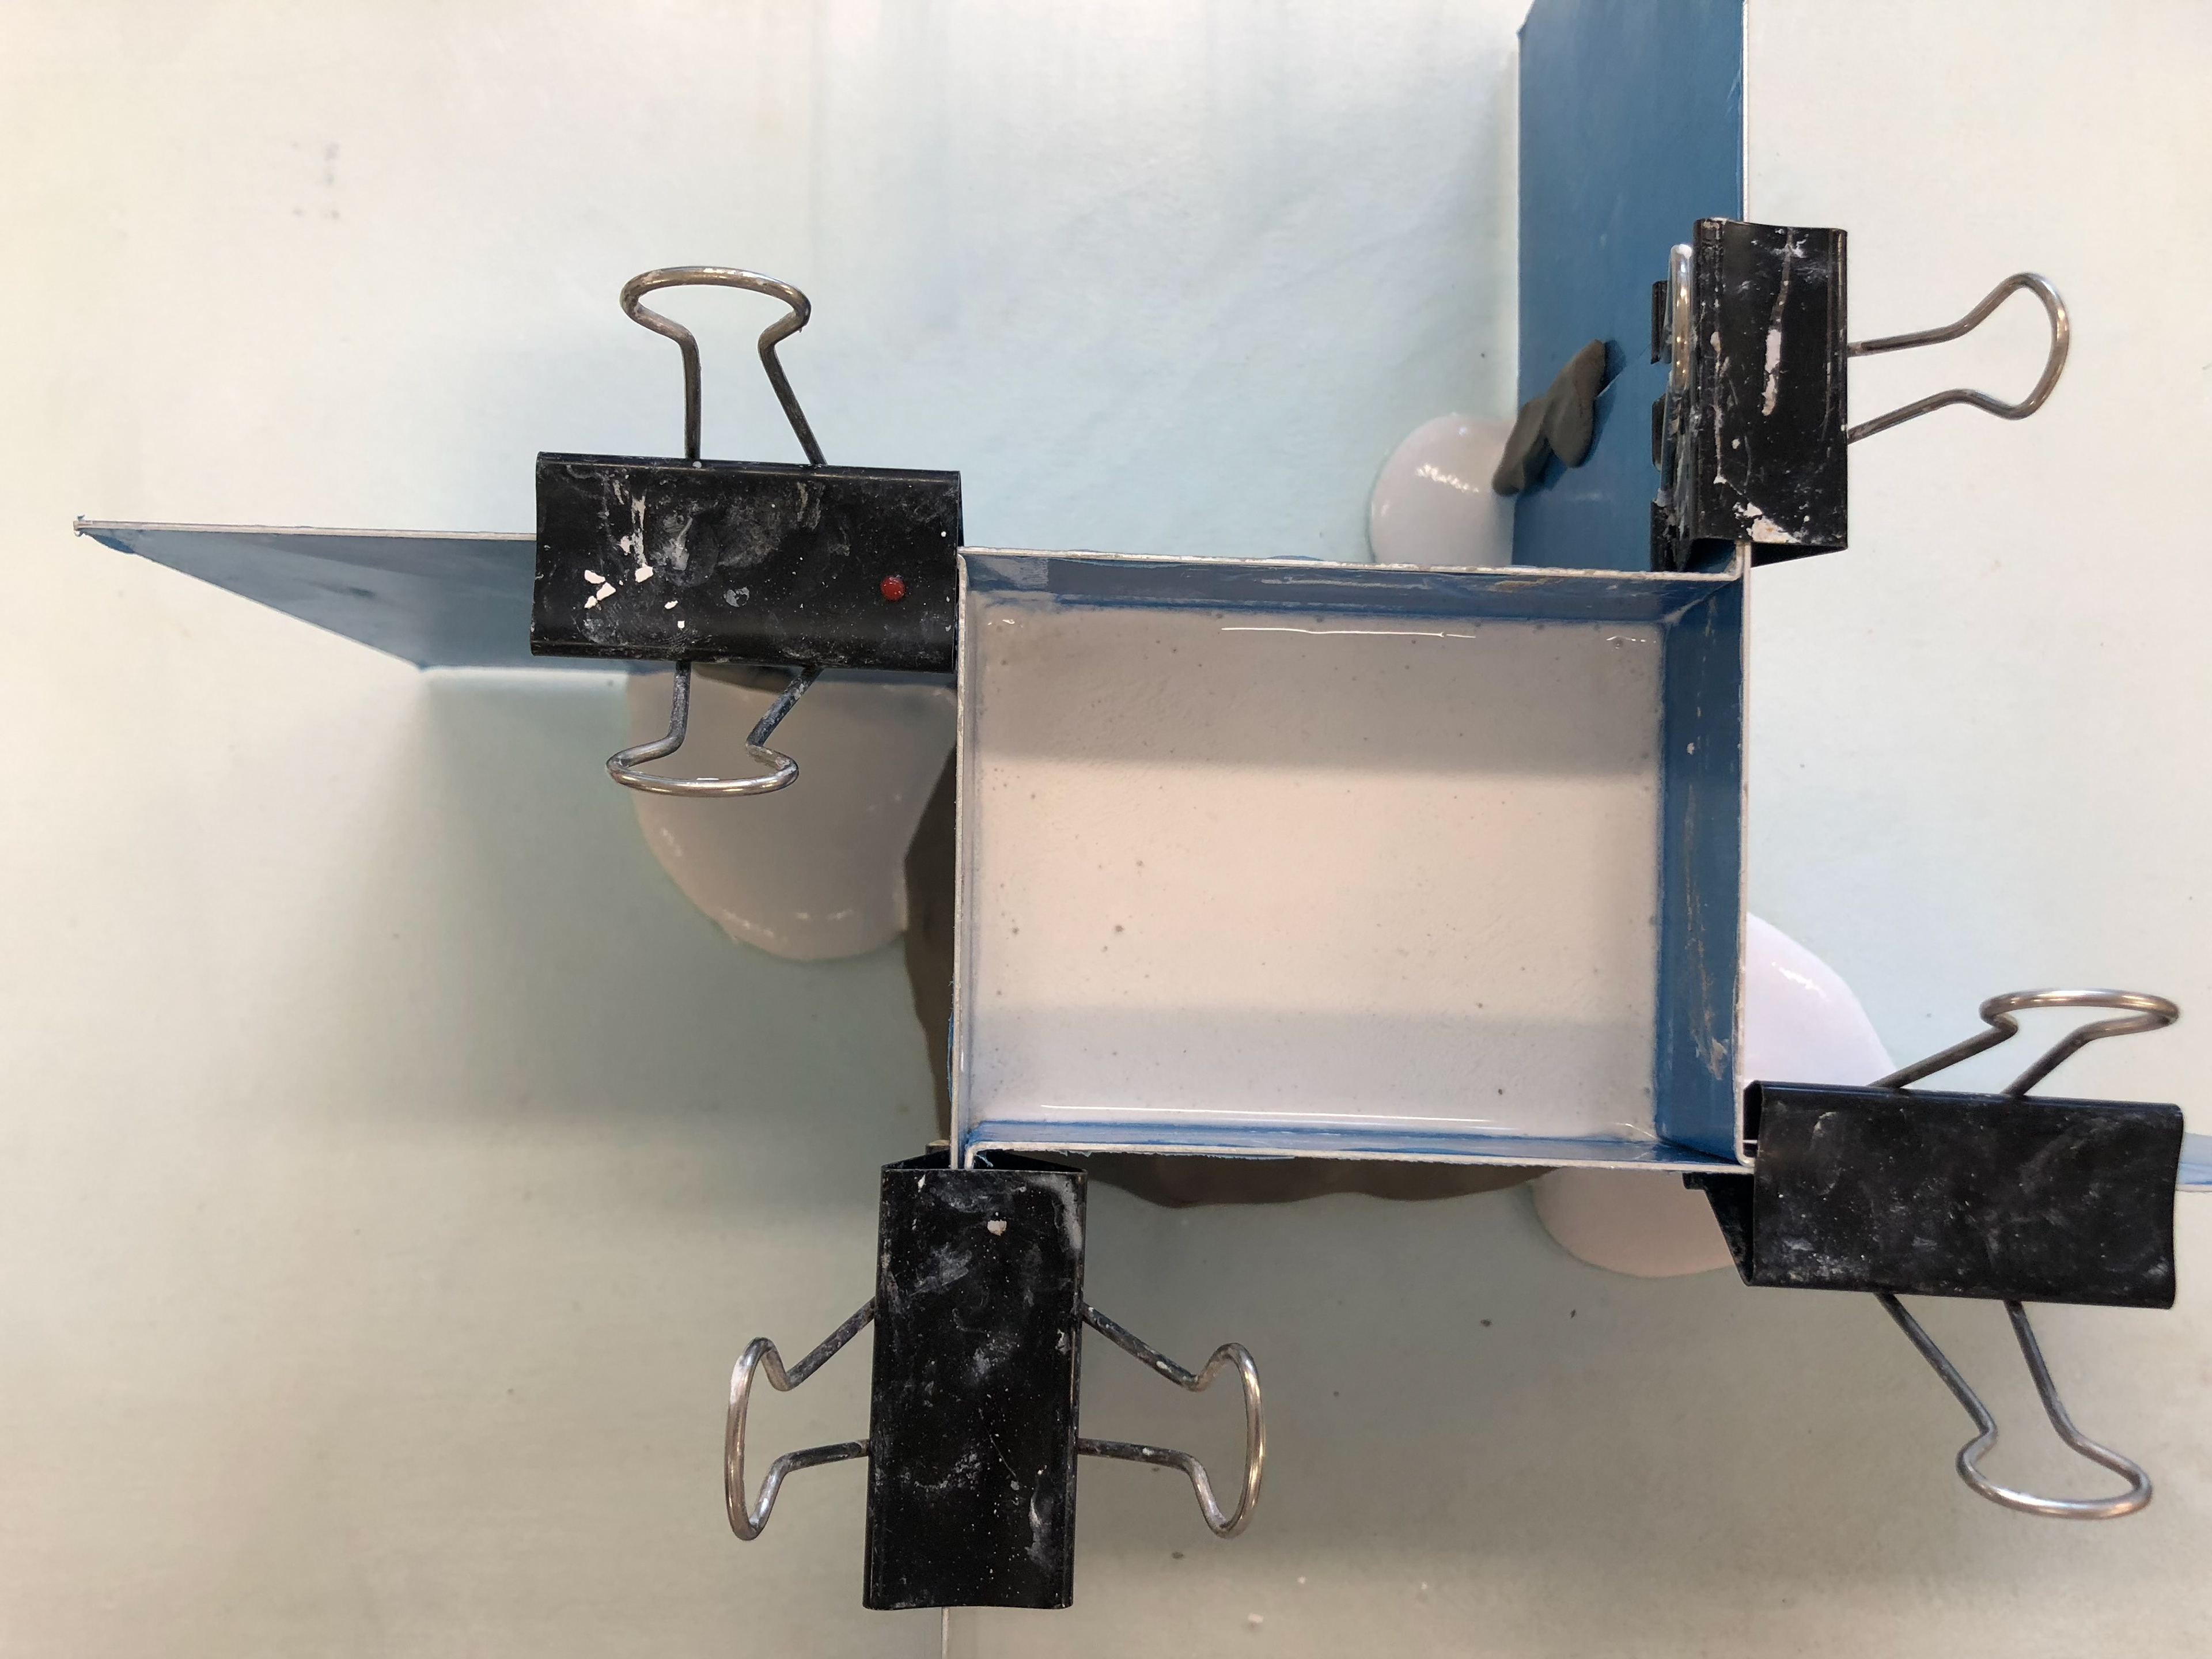
Clay slip ready to pour into the plaster mould.

Pouring the clay slip into my mould.

After 40 minutes I removed the remaining slip.

I left it for another 40 minutes to make sure the remaining slip inside had hardened.

I gently took to duck out of both moulds.

Using a sponge and a little water I removed any blemishes and excess slip from the duck.

I then cut my duck in half to understand how thick the slip had set.

A range of duck's from classmates. The timing from initial slip pour to removing the excess slip, from left to right is 45 mins, 40 mins, 35 mins and 30mins. We all agreed that the best thickness was 35 mins however, the dryness of the mould is an important factor.
We were then asked to make some more ducks but this time with a base. Once again I take the slip and pour it in until it reaches the base of the duck. I then leave it for 30 mins, break the skin and pour the remaining slip out. I then pour some slip back in but this time up to the head of the duck. I then slot the third part of the mould into place then spin and rotate. After 30 mins I take the duck out and use a damp sponge to remove any imperfections on the duck.

The duck after the first slip pour is removed.

I used a rubber inner tube to ensure the two sides of the mould are locked together.

The duck in the last mould part after being formed.

First duck.

The base of the first two ducks weren't brilliant bur with a sponge I can smooth it out.

Three ducks ready to be fired.
Firing and Glazing the Duck's
I had three of the five ducks ready to be put into the kiln for firing. Once they had been fired I then dipped the ducks into glaze. I put one in a clear honey glaze and the remaining four into a clear white glaze. Once they had been refired they were ready for a ceramic transfer.

Three of the five ducks ready to be fired.

Two Duck's glazed in clear white glaze and one in clear honey glaze.

Close up of the clear white glaze.

Close up of clear honey glaze.
Throwing
The first step to throwing is to make the clay into a dome shape on the centre of the wheel. I then spin the wheel and interlock my hands to centre the clay. This keeps the clay in my control, which allows me to shape it into what I wish.
After throwing I leave the thrown clay until it becomes leather hards, which is normally a day or two. The next process is turning. I used a pre-made pot, that a technician had made, to turn. The turning process allows you to remove any imperfections in the shape of the design and to also add a foot lip. To turn, I placed the pot upside down at the centre of the wheel and put some clay to support and create suction around the wheel and the pot. I then used a loop clay trimming tool to remove clay from around the side and from the base to make the foot lip.

Throwing Wheel.

Clay in the centre of the wheel.

Wet the clay and pat it into a nice form that's easy to work with.

My first attempt at a vase. It has very thick walls and has a large lip.

A thrown piece leather hard.

Creating a foot lip on the leather hard piece.
Consistency in throwing.
We were tasked with creating three consistent pots. I achieved similar designs however my size's varied dramatically. At the end I created a family of pots, with my favourite being the smallest pot and removing some of the ones in-between.

Throwing station after three pots

Small pot

Medium pot

Largest pot

The three pots from the side is not consistent

The three pots from the top is slightly consistent but the size slightly varies.

Final tiny pot with a little amount of clay

Tiny pot from above

My favourite but none consistent pots.

My favourite but none consistent pots.
Glazing and Oxides
I took an older piece that I had made and applied a white clear glaze onto it.
I also took scrap clay and plaster then applied different oxides to add colour and enhance the aesthetics of the material the oxide is applied too.

The piece I had made prior to applying the clear white glaze.

Two different oxides on a scrap piece of porcelain.

A selection of oxides on a mix of clay and plaster.

After firing.

After firing.

After firing.

After firing.

After firing.
Ceramic Transfer
Ceramic transfer for an image onto a fired white clay shiny tile.

Tile and image to be transferred.

I put the image in the water until it unfolded.

The image starts to unfold.

I slid the image off the backing paper onto the tile.

Using a rubber kidney I scrapped the image until all the water behind the image had been removed.

The image successfully transferred onto the tile prior to firing in the kiln.
